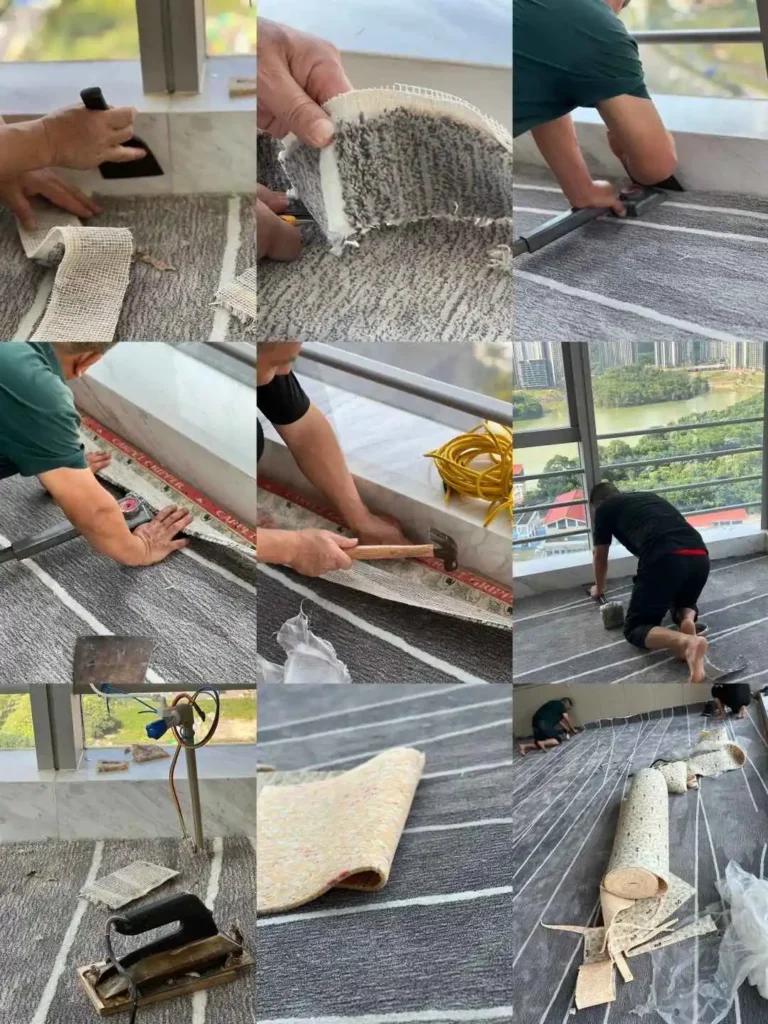
Installing wall-to-wall carpet can transform a room, adding warmth and comfort. However, proper preparation is key to ensuring a successful installation. Here’s a detailed guide on the necessary steps to take before laying your new carpet.

1. Clear the Floor
The first step in preparing for carpet installation is to clear the floor of all furniture, appliances, and any other items. This includes taking out small items like rugs and decorations, as well as larger pieces such as couches and tables. Make sure the space is entirely empty to give yourself room to work. Additionally, take the time to remove any old carpet or flooring, ensuring that the subfloor is visible and accessible.
2. Lay the Floor Mat
Once the floor is clear, it’s time to lay down the floor mat, often referred to as underlayment. This layer provides cushioning, insulation, and noise reduction. Begin by measuring the room to cut the mat to size. Lay the mat flat, ensuring it covers the entire area where the carpet will go. It’s important to use a high-quality mat that’s appropriate for the type of carpet you’re installing.
3. Handle the Edge Seam of the Floor Mat
Next, pay attention to the seams of the floor mat. If your underlayment consists of multiple pieces, make sure the seams are tightly butted together to avoid gaps. Use seam tape or adhesive as needed to secure the edges. Properly handling these seams is crucial, as gaps can lead to uneven carpet installation and reduced durability.
4. Glue the Floor Mat
After securing the seams, it’s time to glue the floor mat down. Use a suitable adhesive recommended for your specific type of mat and subfloor. Apply the glue evenly, following the manufacturer’s instructions. Ensure that the mat is firmly attached to the subfloor to prevent it from shifting during carpet installation.
5. Process Line Interfaces
With the mat securely glued down, check the line interfaces where different pieces of the mat meet. Use a utility knife to trim any excess mat that may cause bumps or unevenness. Ensure that these lines are smooth and flat, as they will affect the overall look and feel of the carpet.
6. Roll Out the Carpet
Now it’s time to roll out the carpet. Start by positioning the carpet roll at one end of the room and slowly unroll it towards the other end. Make sure to leave some excess material along the edges, which can be trimmed later for a perfect fit. Check for any wrinkles or bubbles as you lay the carpet down; these can often be smoothed out as you go.
7. Level the Carpet Further
Finally, ensure that the carpet is properly leveled. Use a carpet roller or your hands to press down any areas that may not be laying flat. Pay special attention to corners and edges to ensure they adhere well to the floor. Once everything is in place, trim any excess carpet at the edges using a utility knife for a clean finish.


https://www.facebook.com/profile.php?id=100076644884545


